Azure Functions written in Rust

A few days ago, we discussed how to write AWS Lambdas in Rust. Today, we’re going to learn how to create and deploy an Azure Function using Rust and the azure-functions-sdk library.
Let’s build our first Azure Function!
Before we proceed, I would like to point out that the code of the Azure Function that we’re going to build is available here for you to take a look if you want to.
But, first things first. As we said earlier we’re going to leverage the azure-functions-sdk library, which is a tool written by Peter Huene, a senior software engineer on the .NET Core team.
The tool is quite well documented and fairly straightforward to use but it’s only supported in Nightly, so we must install the nightly compiler in case we have not done it already:
rustup install nightly
Then, we must set Nightly as our default distribution channel:
rustup default nightly
At the moment of writing this post, it seems that Azure Functions doesn’t support Rust at all.
For a complete list of supported languages you can take a look at the Azure Function Documentation.
Hopefully, it supports the usage of Docker containers!
Creating our Azure Function project
First, we’ll have to install the Azure Functions for Rust SDK using cargo install:
cargo install azure-functions-sdk
Once we have installed this, we’ll have a new func command available that we can use to create new applications, build them and also run them locally.
Let’s create a new project and cd into the generated folder:
cargo func new-app azure-function-rust
cd azure-function-rust
Open it with your IDE of choice and you should be able to see a project with the following structure:

As you can see, the func command has generated an scaffold project with almost everything ready to run your Azure Function!
Writing our first function
We’re going to create just a hello function that will be able to read from the querystring and from the body a name parameter and then return a sentence with this name in it. Pretty basic and simple, I know, but the idea is to focus on how to use the tool rather than the specifics of Rust ![]() .
.
Basically, we have to focus in the src > functions folder. There, we’ll find a mod.rs file, which will serve as a declaration of all the exported functions that we’re going to create (one in our case).
We’ll come back to mod.rs in a minute, but before, we must create a custom module that will contain our hello function. In the functions folder, just create a hello.rs file and write this into it:
use azure_functions::func;
use azure_functions::bindings::{HttpRequest, HttpResponse};
use serde_derive::Deserialize;

// Struct that will hold information about the body of the request.
#[derive(Deserialize)]
pub struct Body {
  name: String,
}

// The func attribute marks this fn as the function to be used by Azure Functions.
#[func]
// See https://docs.microsoft.com/en-us/azure/azure-functions/functions-triggers-bindings#supported-bindings
// See also https://github.com/peterhuene/azure-functions-rs/blob/master/README.md#azure-functions-bindings
#[binding(name="request", auth_level="anonymous")]
// The function will just check for a name parameter in the querystring
// or for a JSON Body structure in the body of the request.
pub fn hello(request: &HttpRequest) -> HttpResponse {
  // Logs the request on the Azure Functions Host.
  info!("Request: {:?}", request);

  // checking the query string
  if let Some(name) = request.query_params().get("name") {
    return format!("Hello from Rust, my dear {}! (qs)", name).into();
  }

  // checking the body
  if let Ok(body) = request.body().as_json::<Body>() {
    return format!("Hello from Rust, my dear {}! (body)", body.name).into();
  }

  "Hello from Rust, my dear default user with no params!".into()
}
For this to work properly we will have to also install some serde crates. Open your Cargo.toml and insert the following dependencies:
[dependencies]
azure-functions = "0.3.0"
log = "0.4.6"
serde = "1.0.82"
serde_derive = "1.0.82"
serde_json = "1.0.33"
Finally, we’re going to get back to our mod.rs file, open it and export our brand new hello.rs module:
mod hello;

pub const FUNCTIONS: &[&azure_functions::codegen::Function] = azure_functions::export!{
  hello::hello,
};
Running the Azure Function locally
Ok, running the function locally is super simple. Just get to your terminal and execute this:
cargo func run
If you browse to http://localhost:8080 you should be able to see something similar to this:

Cool ![]() , now, to execute our function, just use the following url:
, now, to execute our function, just use the following url: http://localhost:8080/api/hello?name=Reader.
You should be seeing something similar to the image below:

Deploying our function to Azure
As we mentioned earlier, in order to be able to use Rust we have to leverage the power of Docker containers.
Unfortunately, this comes at a price as we won’t be able to use the Consumption Plan, which basically means that you lose the ability to pay only while your functions are running. As you will see in a moment, we’ll have to create a custom App Service Plan.
But before that, we have to build our project, create a Docker image and push it to Docker Hub (or a custom registry of yours).
Let’s do it!
Building the Azure Function
Let’s build our Azure Function:
cargo func build
This will create a Docker image called azure-functions/<name_of_your_project>. In our case, if you do docker images you should be able to see a Docker image called azure-functions/azure-function-rust.
Now, in order to push it to Docker Hub we must log in using our Docker account.
Let’s create a new tag:
docker tag azure-functions/azure-function-rust <username>/azure-function-rust
# eg. docker tag azure-functions/azure-function-rust robertohuertasm/azure-function-rust
If you do docker images again you should see the tag.
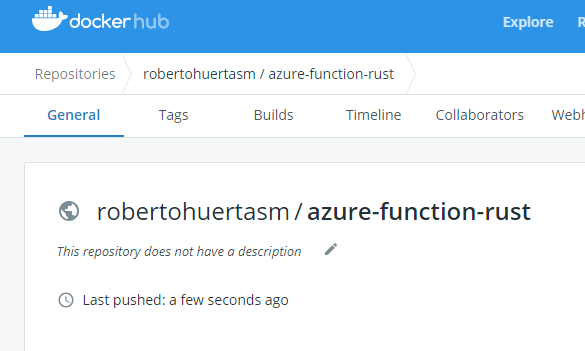
Finally, let’s push it to Docker Hub and check that the image has been correctly uploaded:
docker push <username>/azure-function-rust

Creating our Azure Function in the Azure Portal
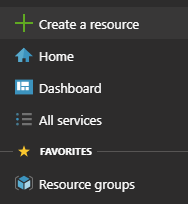
Go to your Azure Portal and click over the Create a resource option.

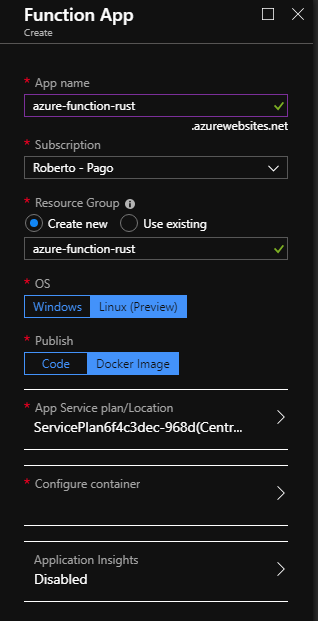
Look for Function App and create one.
Then just fill the form accordingly:

Be sure that you choose the right App Service Plan for you according to your location and the pricing tier.
Finally, let’s configure the container and create the Azure Function:

Now wait for it to be deployed.
Checking that everything works as expected
NOTE: You’ll notice that the
Azure Functionurls below won’t work. I decided to stop theApp Service Plandue to its elevated price.
Once your Azure Function is deployed just browse to its corresponding URL and check that everything is ok. In my case, the Url is https://azure-function-rust.azurewebsites.net.
If you just browse there you’ll see the same blue screen that we saw when testing this locally so let’s go ahead and browse to https://azure-function-rust.azurewebsites.net/api/hello?name=Reader.
Are you seeing this?

Try now to make a POST request and see what happens! ![]()
Conclusions
As you can see, creating an Azure Function using Rust is pretty straightforward. Nevertheless, it feels a little bit too much to have to use Docker for this and having to give up to the Consumption Plan.
In my opinion, although writing AWS Lambdas in Rust feels a little bit convoluted it seems a better option if you’re willing to save some money and leverage the auto-scaling functionalities. Let’s hope Microsoft adds support for Rust soon ![]() !
!