
Rust once and share it with Android, iOS and Flutter

What if I told you that you could use the same very performant code in Android, iOS or even in Flutter. In this article, we’ll see how to achieve this with Rust.
But, why would we want something like this?
Imagine that you have a mobile app that needs to process some audio in order to get some insights about the user but you don’t want the audio to be sent to the server to be processed. You want to preserve the privacy of the user. In this kind of scenario, it would make sense to avoid having to write a specific library for Android and another one for iOS. Having just a shared library would save us from having to maintain two different codebases and would diminish the chance to get more bugs.
That’s nice, but how could we do something like this? Enter Rust. With Rust, not only would you be able to share the same code among multiple platforms, but you could also take advantage of the boost of performance that you will get by using it.
What are we going to do
We are going to write a simple shared Rust library and compile it to Android and iOS, and as a bonus, we will also write a Flutter plugin using the very same code.
As you can see, the scope of this article is quite broad so we’ll try to keep everything organized.
You can also read this post while taking a look at the associated GitHub repository.
Scaffolding our project
Let’s start by creating a folder called rust-for-android-ios-flutter and create four folders in it (android, ios, flutter & rust):
mkdir rust-for-android-ios-flutter
cd rust-for-android-ios-flutter
mkdir ios android rust flutter
Once we have it, just cd into the rust folder and create a new Rust library called rustylib:
cd rust
cargo init --name rustylib --lib
This library will only have one function that will get a string as its argument and will return a new string. Basically, just a Hello, World!. But just think of it as a function that could work as the entry point to a more complex process completely written in Rust.
Let’s install some targets
In order to compile our rustylib library to Android and iOS we will need to have some targets installed in our machine:
# Android targets
rustup target add aarch64-linux-android armv7-linux-androideabi i686-linux-android x86_64-linux-android

# iOS targets
rustup target add aarch64-apple-ios armv7-apple-ios armv7s-apple-ios x86_64-apple-ios i386-apple-ios
Tools for iOS
For iOS we have to be sure that we have Xcode installed in our computer and the Xcode build tools already set up.
# install the Xcode build tools.
xcode-select --install
# this cargo subcommand will help you create a universal library for use with iOS.
cargo install cargo-lipo
# this tool will let you automatically create the C/C++11 headers of the library.
cargo install cbindgen
As you can see, we have also installed cargo-lipo and cbindgen.
Tools for Android
For Android, we have to be sure that we have correctly set up the $ANDROID_HOME environment variable. In macOS this is tipically set to ~/Library/Android/sdk.
It is also recommended that you install Android Studio and the NDK. Once you have everything installed, ensure that the $NDK_HOME environment variable is properly set. In macOS this should be tipically set to ~/Library/Android/sdk/ndk-bundle.
Finally, we’re just going to install cargo-ndk, which handles finding the correct linkers and converting between the triples used in the Rust world to the triples used in the Android world:
cargo install cargo-ndk
Rust library configuration
The next step is to modify our Cargo.toml. Just make sure it looks similar to this:
[package]
name = "rustylib"
version = "0.1.0"
authors = ["Roberto Huertas <[email protected]>"]
edition = "2018"

# See more keys and their definitions at https://doc.rust-lang.org/cargo/reference/manifest.html

[lib]
name = "rustylib"
# this is needed to build for iOS and Android.
crate-type = ["staticlib", "cdylib"]

# this dependency is only needed for Android.
[target.'cfg(target_os = "android")'.dependencies]
jni = { version = "0.13.1", default-features = false }
iOS project
Now, let’s create an iOS project using Xcode.
In iOS you can use 2 different types of user interface. As we want to show how to use both of them, let’s create two different kind of projects.
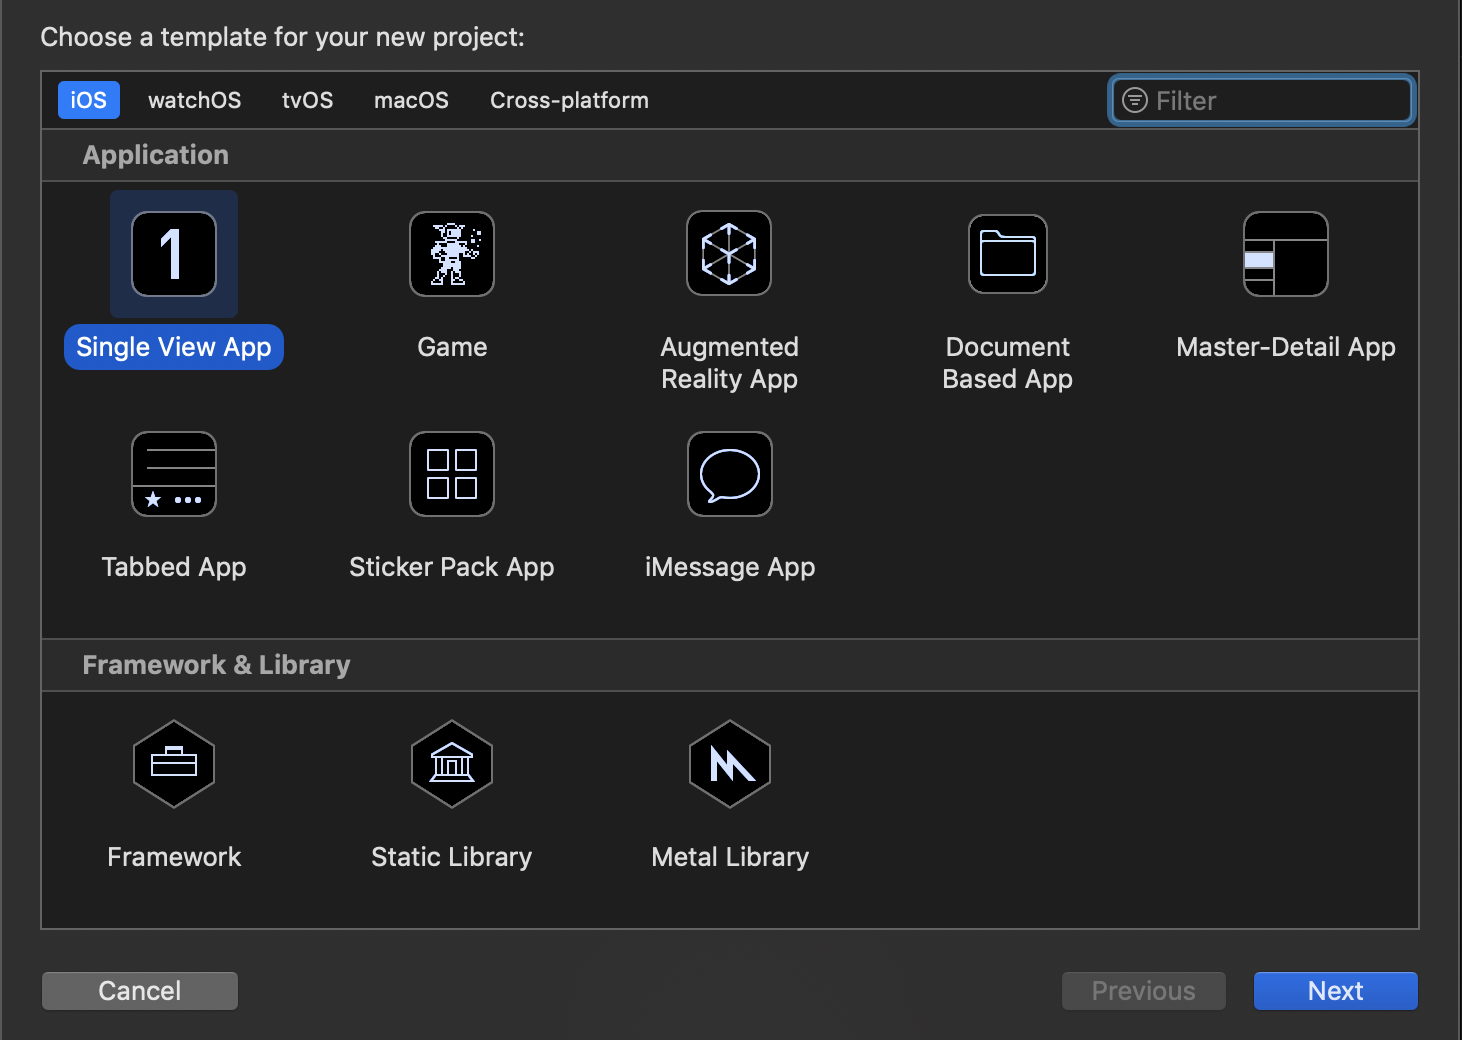
Storyboard
We’re choosing Storyboard as our user interface and we’re naming the project rusty-ios-classic.
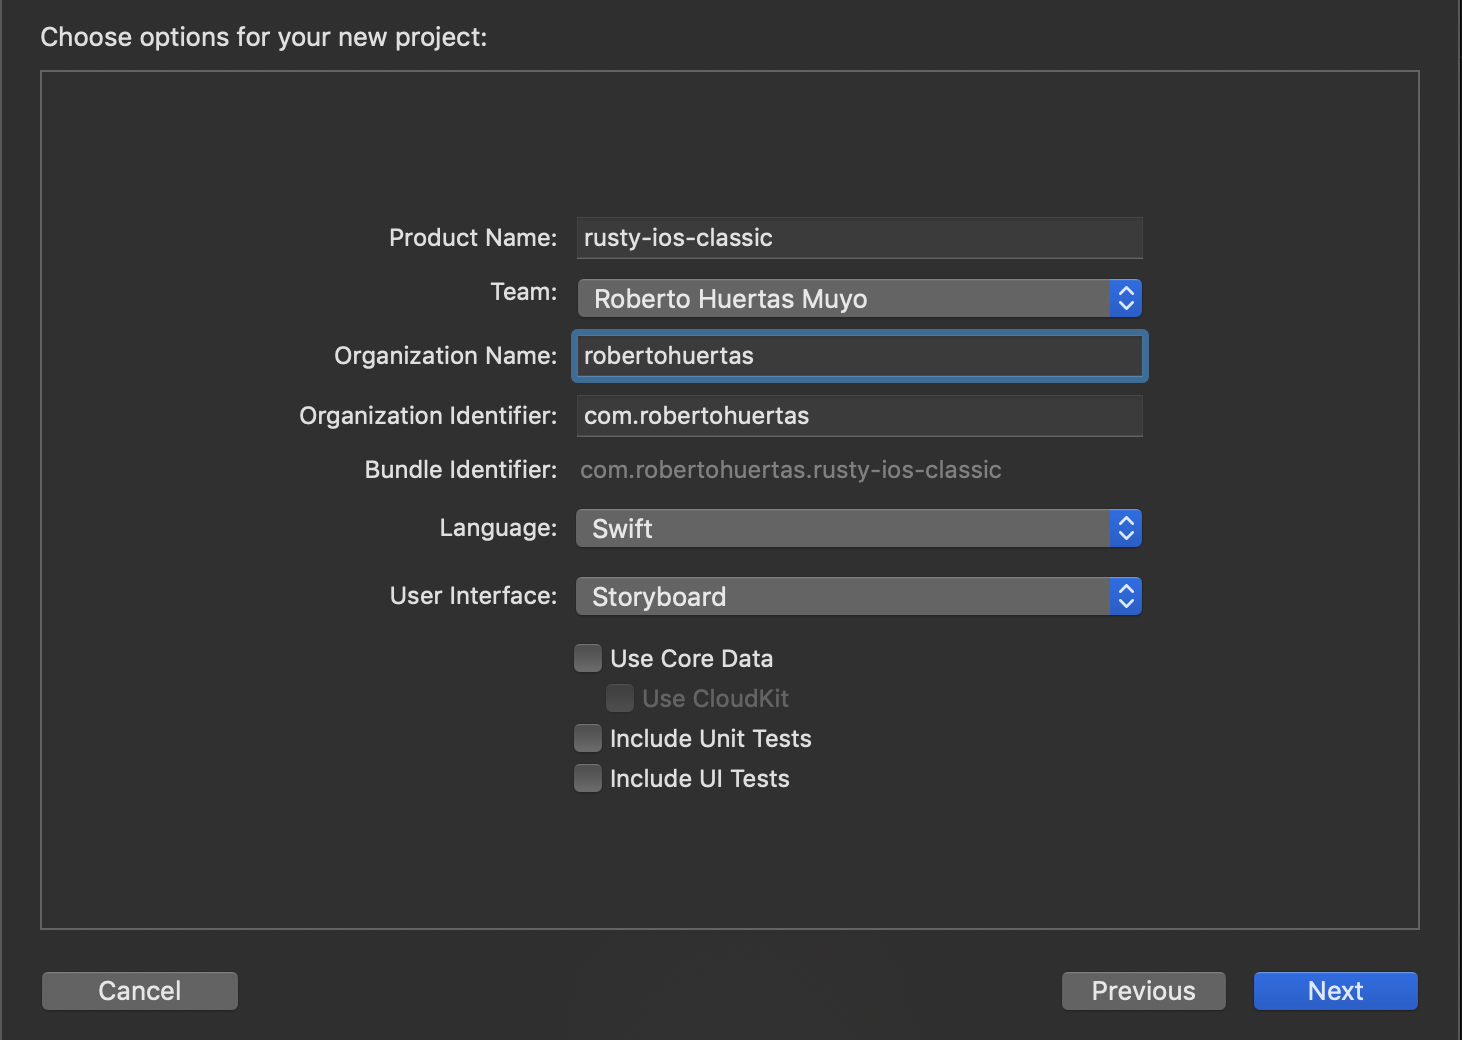
Save it in the previously created ios folder.
SwiftUI
Let’s create now a new iOS project. But this time we’re going to select SwiftUI as our user interface and name it rusty-ios.
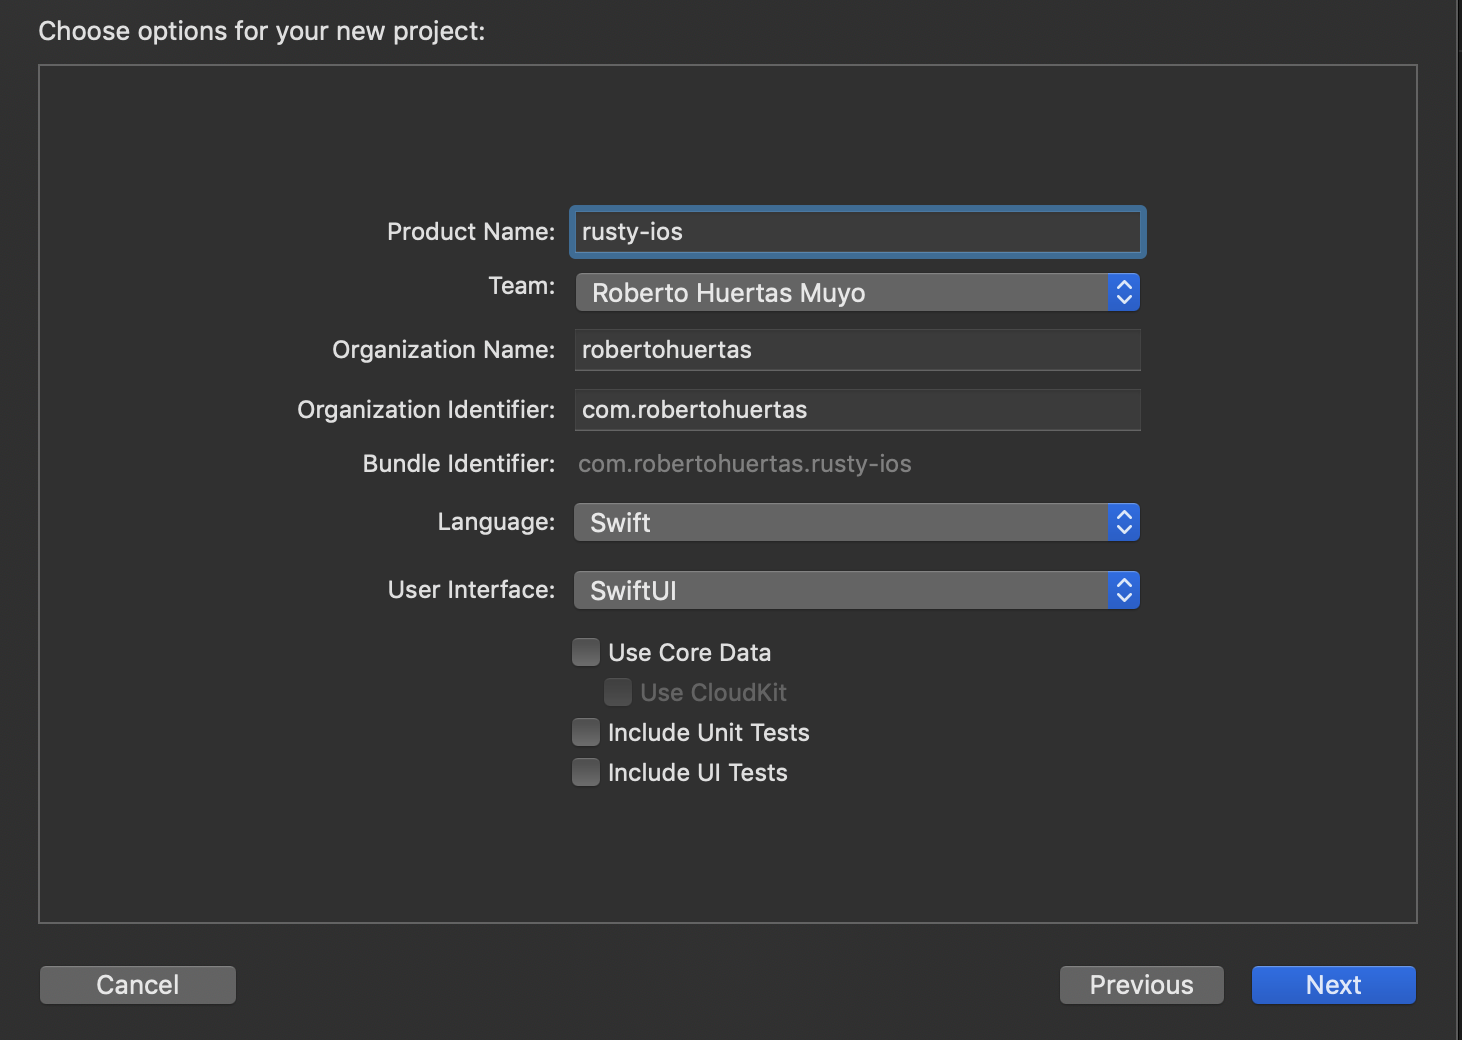
Save it again in the ios folder.
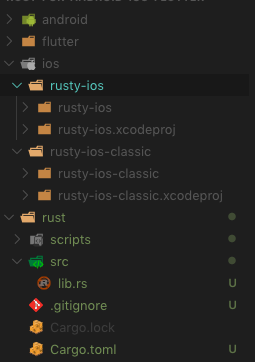
Your treeview should look similar to this one:
Writing our first Rust code
Now, go to the Rust project, open the lib.rs file and make sure it looks exactly like this:
use std::ffi::{CStr, CString};
use std::os::raw::c_char;

#[no_mangle]
pub unsafe extern "C" fn hello(to: *const c_char) -> *mut c_char {
    let c_str = CStr::from_ptr(to);
    let recipient = match c_str.to_str() {
        Ok(s) => s,
        Err(_) => "you",
    };

    CString::new(format!("Hello from Rust: {}", recipient))
        .unwrap()
        .into_raw()
}

#[no_mangle]
pub unsafe extern "C" fn hello_release(s: *mut c_char) {
    if s.is_null() {
        return;
    }
    CString::from_raw(s);
}
The #[no_mangle] attribute is vital here to avoid the compiler from changing the name of the function. We want the name of the function to be exported as it is.
Note also that we’re using extern "C". This tells the compiler that this function will be called from outside Rust and ensures that it is compiled using C calling conventions.
You may be wondering why on Earth we need this hello_release function. The key here is to take a look at the hello function. Using CString and returning the raw representation keeps the string in memory and prevents it from being released at the end of the function. If the memory were to be released, the pointer provided back to the caller would now be pointing to empty memory or to something else entirely.
In order to avoid a memory leak, because we have now a string that sticks around after the function has finishing executing, we have to provide the hello_release function that takes a pointer to a C string and frees that memory. It’s very important not to forget calling this function from the iOS code if we don’t want to get into troubles. If you look closely at this function, you’ll notice that it leverages the way memory is managed in Rust by using the function’s scope in order to free the pointer.
This code will be the one that we’ll use for our iOS projects.
Compiling for iOS
Before we compile the library for iOS we’re going to generate a C header that will work as a bridge for our Swift code to be able to call our Rust code.
We’ll be leveraging cbindgen for this:
cd rust
cbindgen src/lib.rs -l c > rustylib.h
This should generate a file called rustylib.h containing the following code:
#include <stdarg.h>
#include <stdbool.h>
#include <stdint.h>
#include <stdlib.h>

char *hello(const char *to);

void hello_release(char *s);
Note that cbindgen has automatically generated the C interface for us in a very convenient way.
Now, let’s proceed to compile our Rust library so it can be consumed in any iOS project:
# it's important to not forget the release flag.
cargo lipo --release
Check out your target/universal/release folder and look for a file called librustylib.a. That’s the binary we’re going to use in our iOS projects.
Using the iOS binary
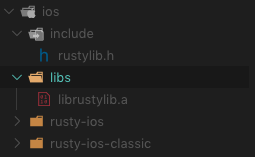
First, we’re going to copy our librustylib.a and rustylib.h files into the ios folder:
# we're still in the `rust` folder so...
inc=../ios/include
libs=../ios/libs

mkdir ${inc}
mkdir ${libs}

cp rustylib.h ${inc}
cp target/universal/release/librustylib.a ${libs}
You should be seeing a treeview like this one, with an include and a libs file:
As you can imagine, having to manually do this every time you have to compile a new version of your Rust library would be very tedious. Fortunately, you can automate this process by using a simple bash script like this one.
Now, the following is something that you will need to do only once (twice if you have created two iOS projects as the article described).
Let’s open our rusty-ios-classic project in Xcode and let’s do the following:
Add the librustylib.a file in the General > Frameworks, Libraries and Embedded Content section. Ensure that you see the name of the library there. If it is not shown, try it again. I’m not sure if it’s an Xcode bug but most of the times you’ll need to add it twice for it to work correctly.
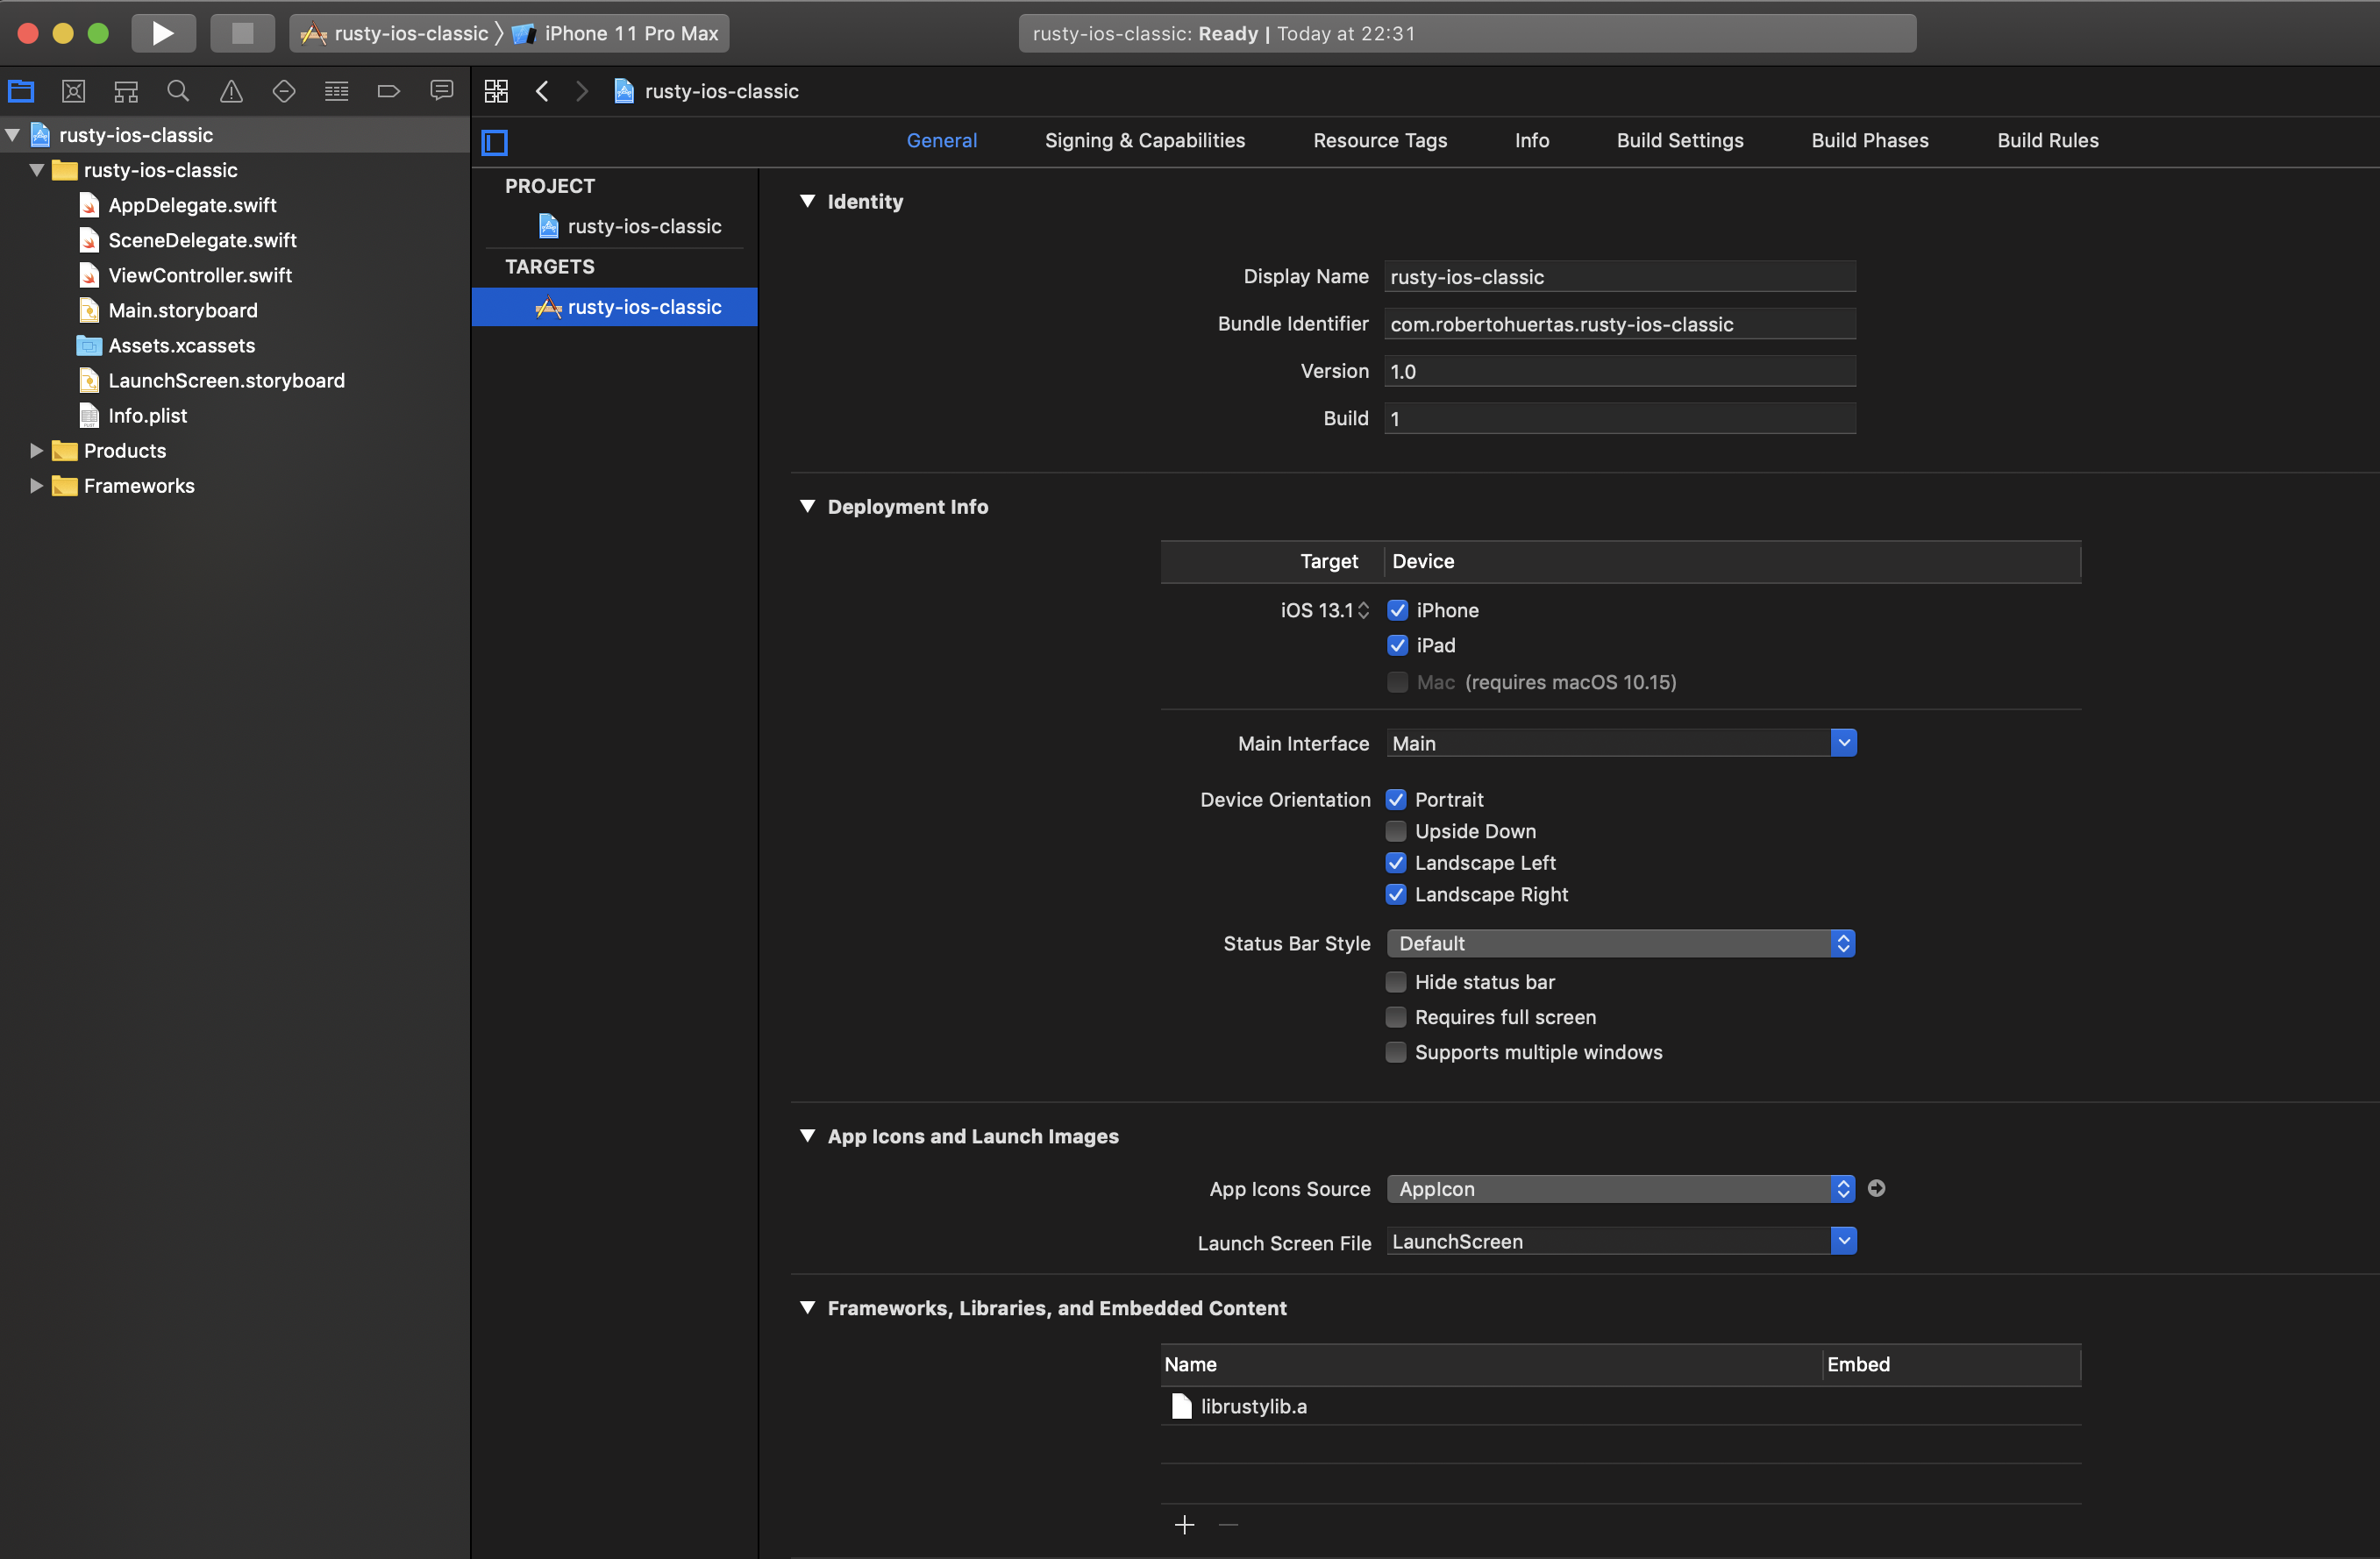
After that, go to the Build Settings tab, search for search paths and add the header and library search paths. You can use relative paths or use the $(PROJECT_DIR) variable to avoid hardcoding your local path.
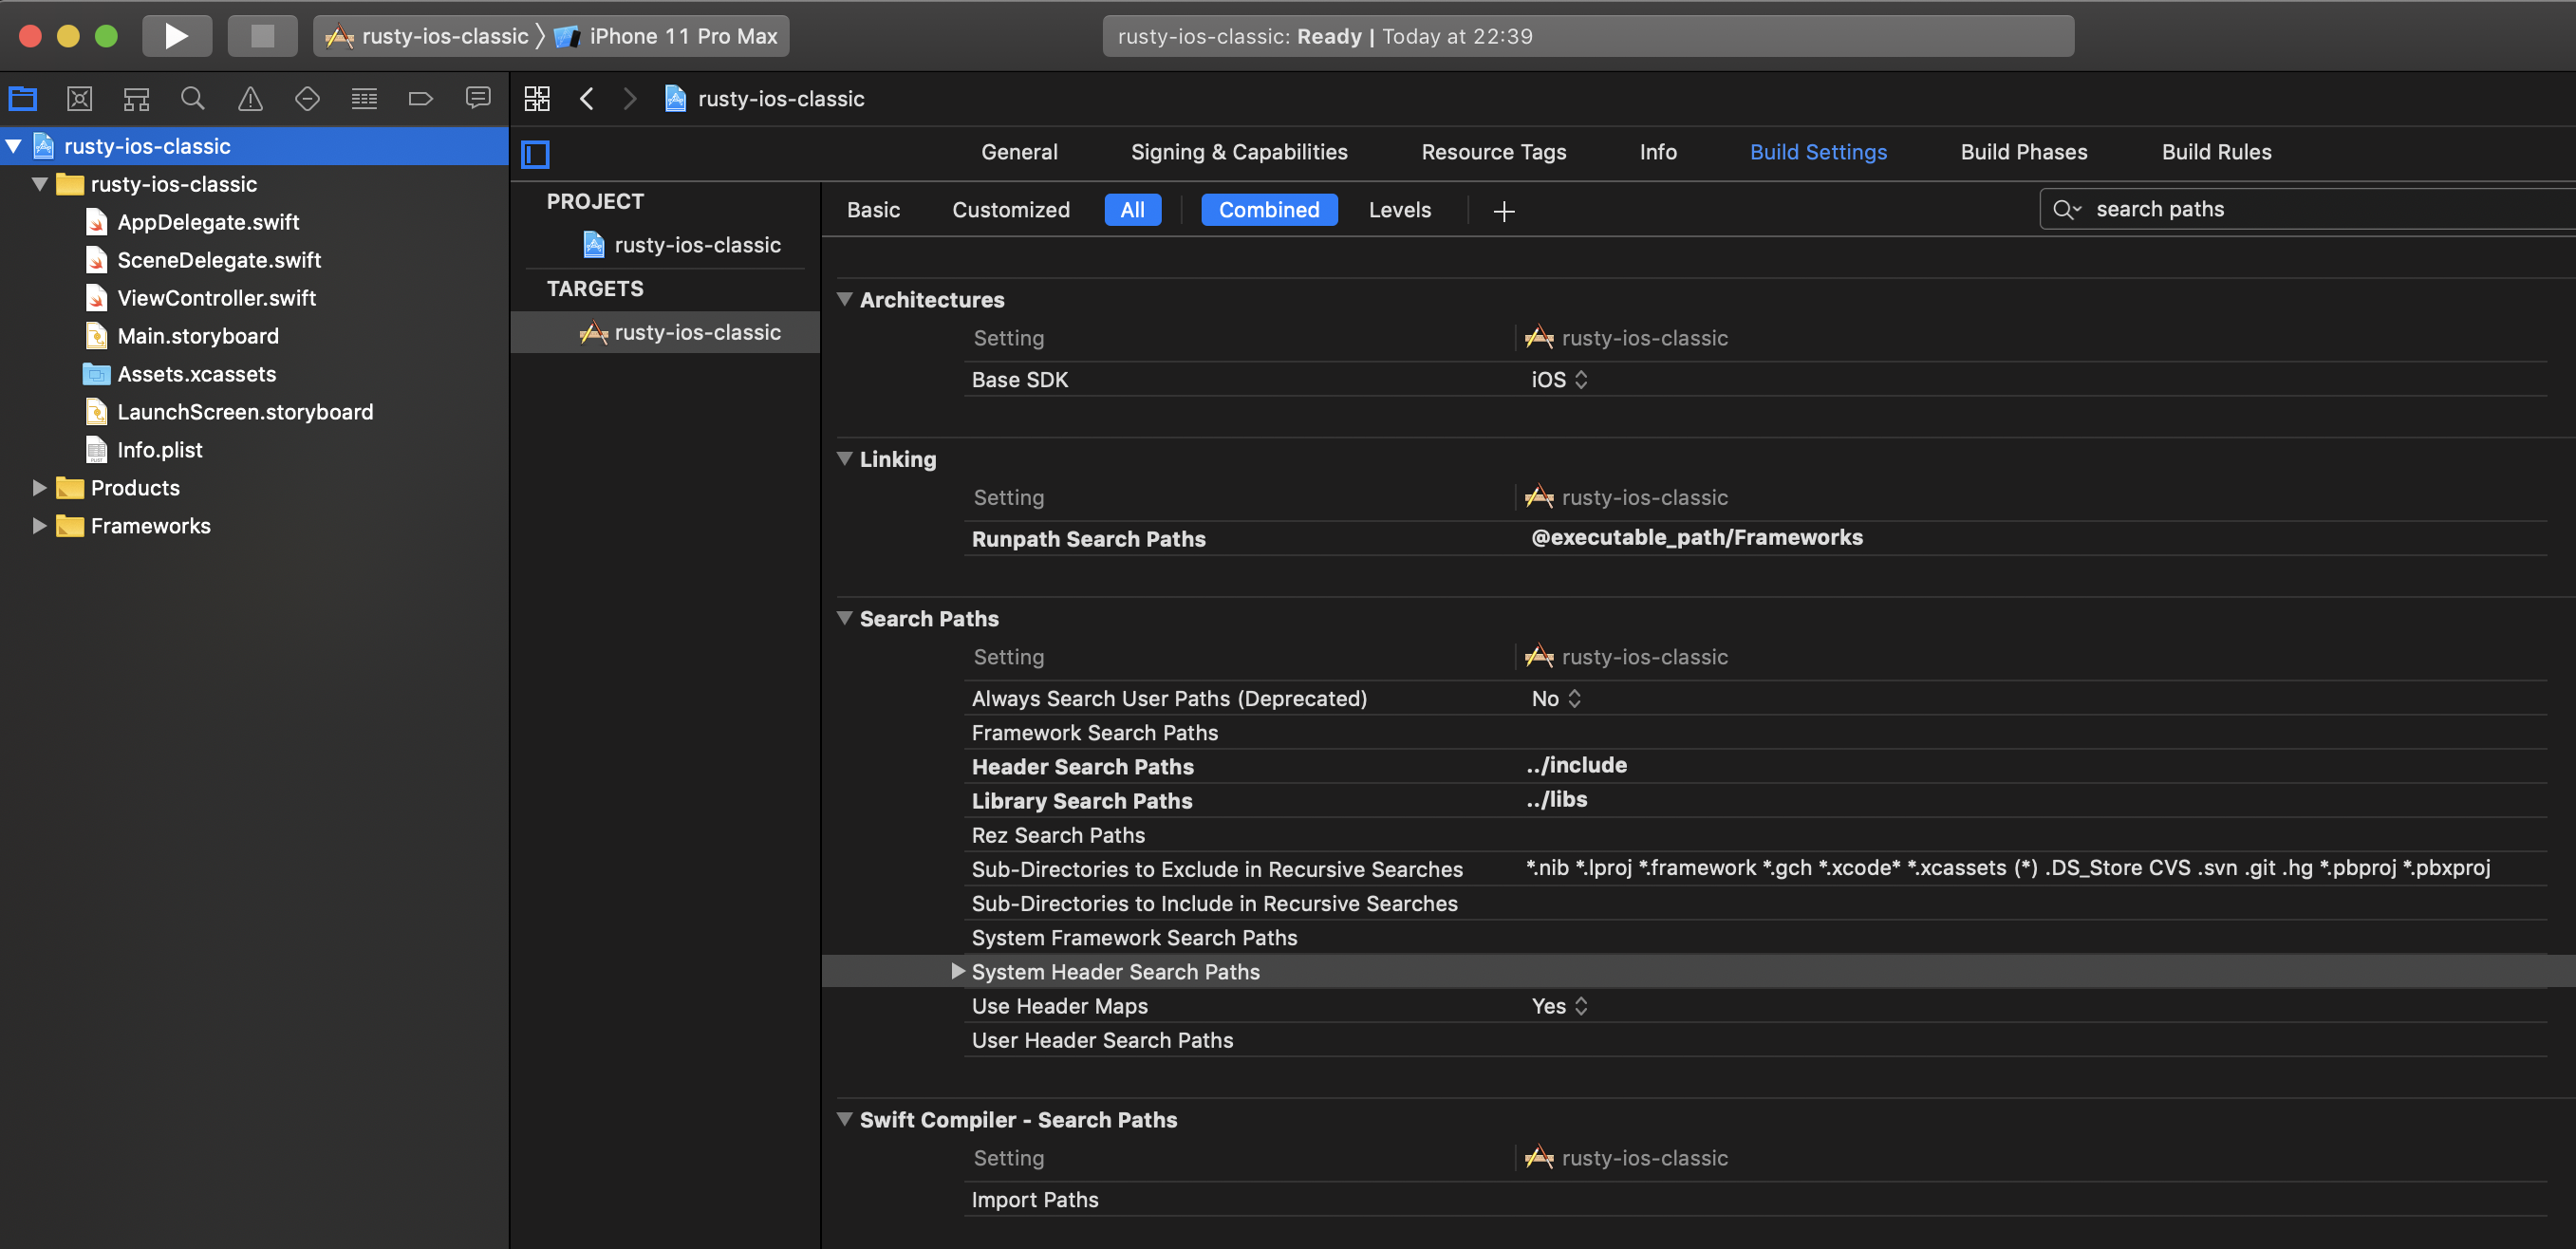
Finally, let’s add the Objective-C Bridging header. Search for bridging header in the Build Settings tab:
Repeat the same for our rusty-ios project in case you want to try both types of iOS projects.
In our rusty-ios project
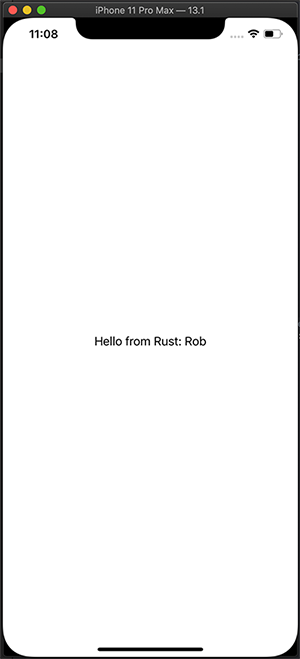
If you’re using the project that uses SwiftUI as a user interface, then open the ContentView.swift file and make it look like this:
import SwiftUI

struct ContentView: View {
    let s = getName()
    var body: some View {
        Text(s)
    }
}

struct ContentView_Previews: PreviewProvider {
    static var previews: some View {
        ContentView()
    }
}

func getName() -> String {
    let result = hello("Rob")
    let sr =  String(cString: result!)
    // IMPORTANT: once we get the result we have to release the pointer.
    hello_release(UnsafeMutablePointer(mutating: result))
    return sr
}
Run the project in Xcode.
In this case, you should be able to see Hello from Rust: Rob in the emulator or device you’re using to test the app ![]() .
.
In our rusty-ios-classic project
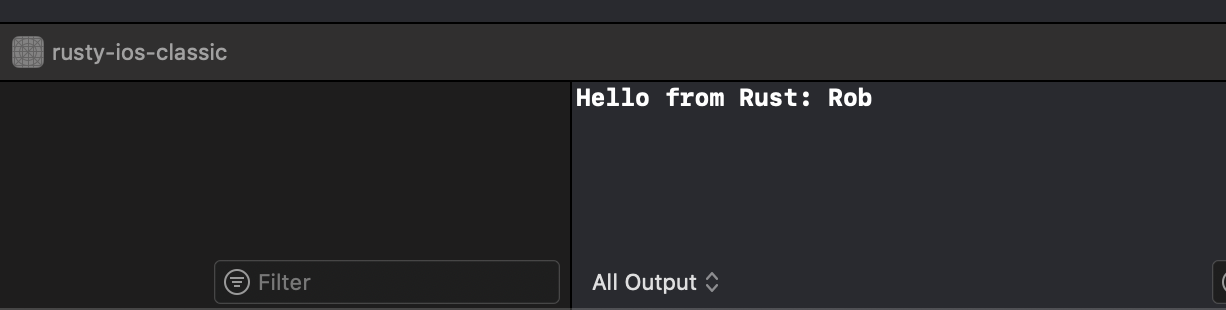
In case you’re using the project with a Storyboard user interface, open the ViewController.swift file and make it look like this:
import UIKit

class ViewController: UIViewController {

    override func viewDidLoad() {
        super.viewDidLoad()
        // Do any additional setup after loading the view.
        let result = hello("Rob")
        let s_result = String(cString: result!)
        // IMPORTANT: once we get the result we have to release the pointer.
        hello_release(UnsafeMutablePointer(mutating: result))
        print(s_result)
    }
}
Run the project in Xcode.
If everything is fine, you should be able to see Hello from Rust: Rob in the output pane. ![]()
Android project
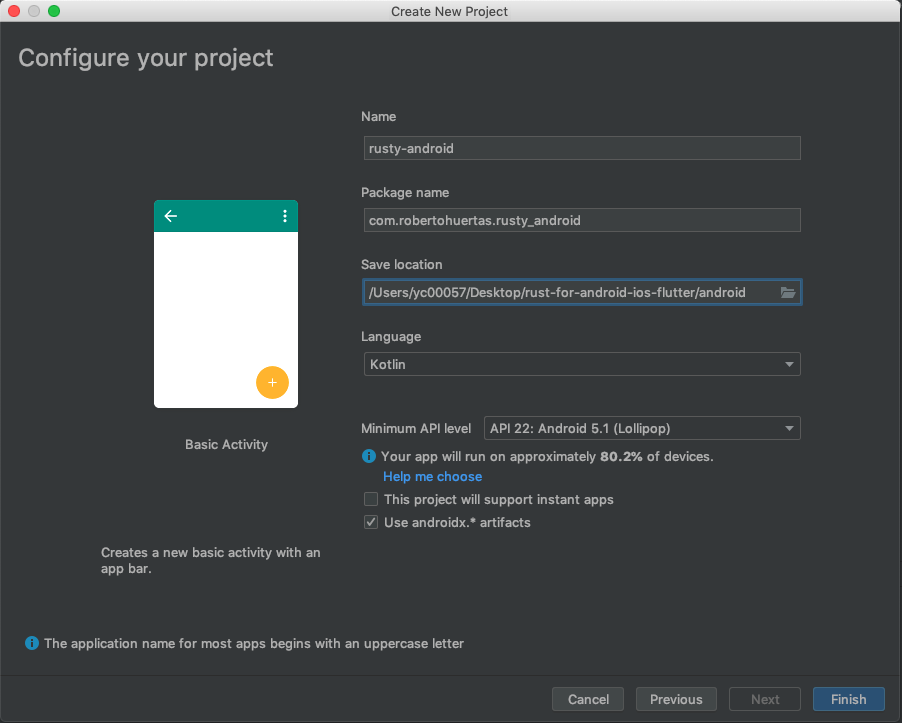
Let’s open Android Studio and let’s create our Android project: File > New...> New Project > Basic Activity.
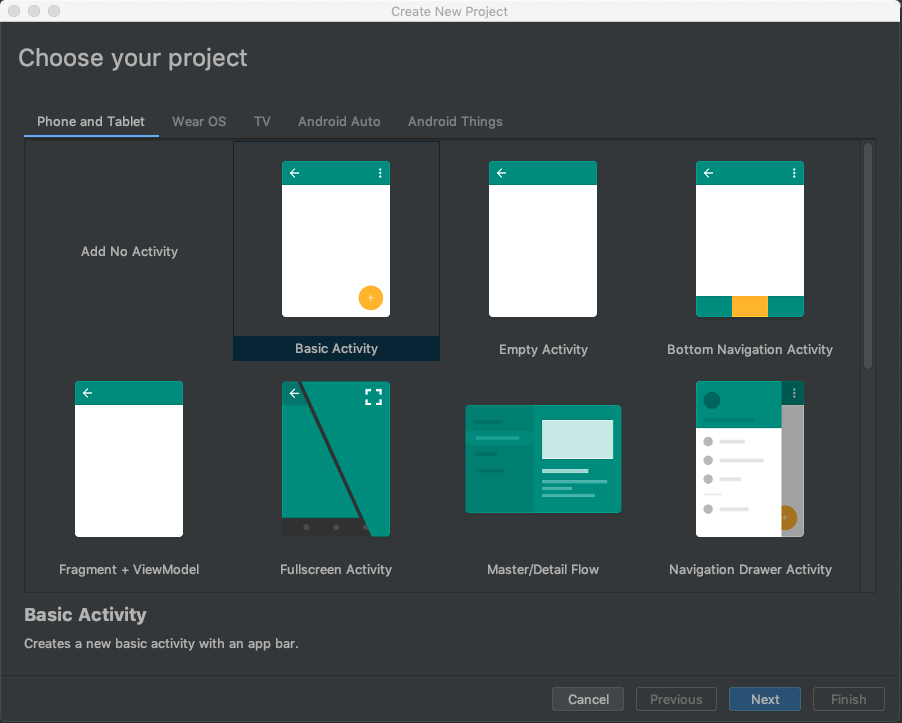
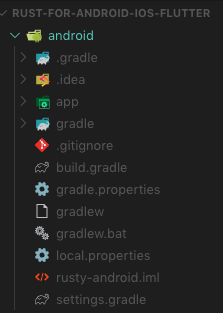
Name it rusty-android and set the package name. We’ll choose Kotlin as our default language and minimum API 22.
You should end up with a treeview similar to this one:
JNI
If you remember when we discussed about how to create our iOS project, we needed to create a C header working as a bridge. In Android we will leverage the Java Native Interface or JNI for short and we will expose our functions through it. The way that JNI constructs the name of the function that will be called follows a specific convention: Java_<domain>_<qualified_classname>_<methodname>. In our case, that would be Java_com_robertohuertas_rusty_1android_MainActivity_hello (note that _1 represents underscores _ in the qualified class name).
As you can imagine, if we have to name our functions in such a specific way, this can pose a problem if we want to reuse this very same code in other Android apps. We have several alternatives, though. We can use some sort of proxy class that follows the same specific domain and class naming and include it in every project or we can create an Android Library and use it everywhere.
In our case, we’re going to create an Android Library.
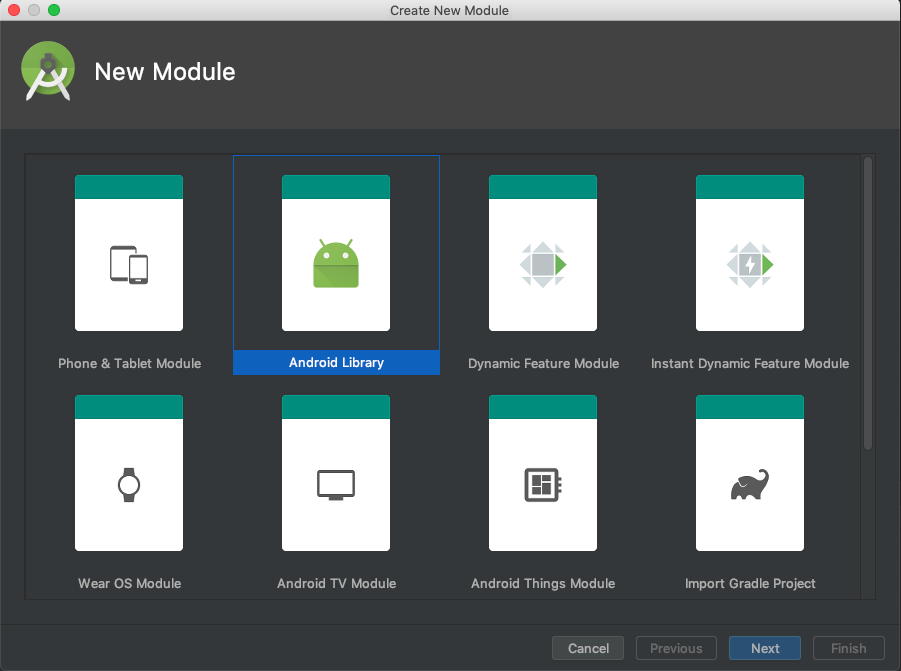
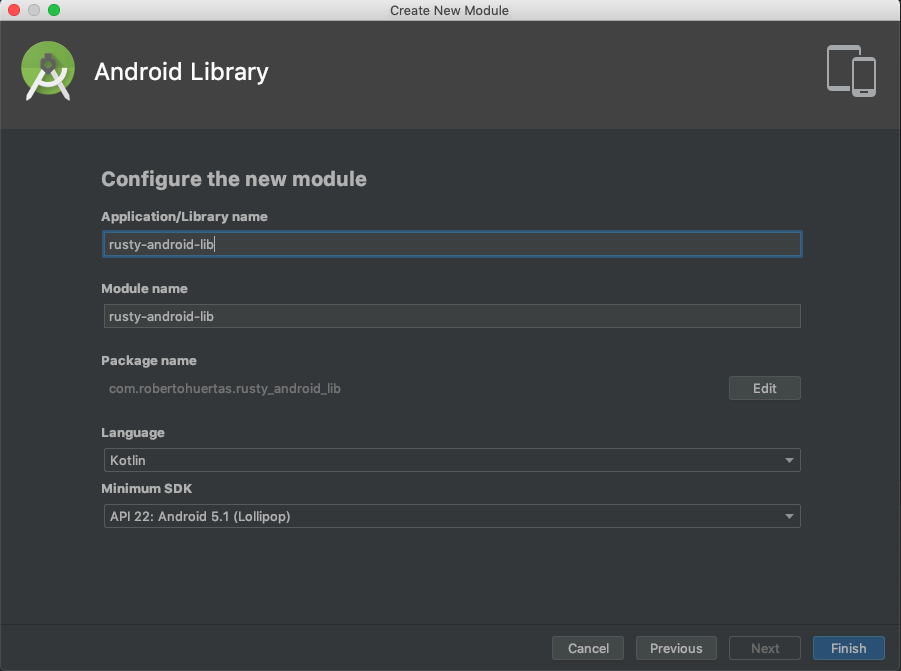
Creating an Android Library
In Android Studio, File > New > New Module.... Then choose Android Library.
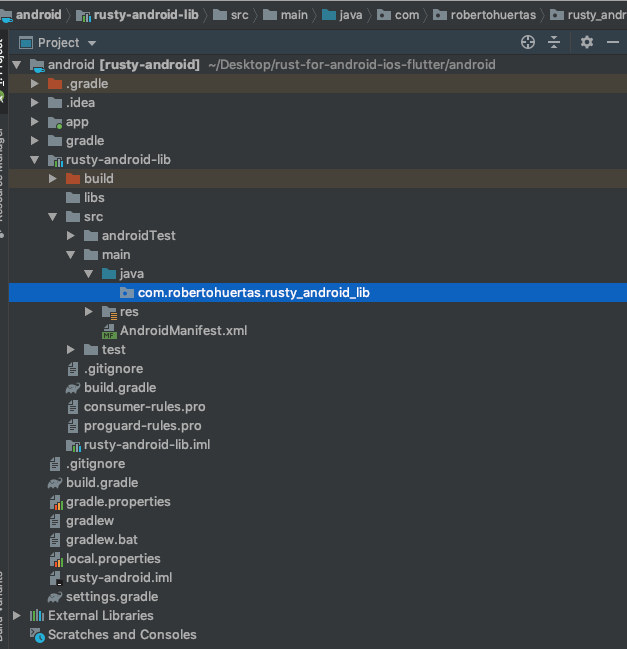
Your Android Studio project pane should look similar to the one below:
Adding a little bit more Rust
Ok, so let’s create our Android functions by leveraging the JNI naming conventions.
Let’s cd into our rust/src folder and create a new android.rs file:
cd rust/src
echo > android.rs
Once you have it, copy this code into it:
#![cfg(target_os = "android")]
#![allow(non_snake_case)]

use crate::hello;
use jni::objects::{JClass, JString};
use jni::sys::jstring;
use jni::JNIEnv;
use std::ffi::CString;

// NOTE: RustKt references the name rusty.kt, which will be the kotlin file exposing the functions below.
// Remember the JNI naming conventions.

#[no_mangle]
pub extern "system" fn Java_com_robertohuertas_rusty_1android_1lib_RustyKt_helloDirect(
  env: JNIEnv,
  _: JClass,
  input: JString,
) -> jstring {
  let input: String = env
    .get_string(input)
    .expect("Couldn't get Java string!")
    .into();
  let output = env
    .new_string(format!("Hello from Rust: {}", input))
    .expect("Couldn't create a Java string!");
  output.into_inner()
}

#[allow(clippy::similar_names)]
#[no_mangle]
pub extern "system" fn Java_com_robertohuertas_rusty_1android_1lib_RustyKt_hello(
  env: JNIEnv,
  _: JClass,
  input: JString,
) -> jstring {
  let java_str = env.get_string(input).expect("Couldn't get Java string!");
  // we call our generic func for iOS
  let java_str_ptr = java_str.as_ptr();
  let result = unsafe { hello(java_str_ptr) };
  // freeing memory from CString in ios function
  // if we call hello_release we won't have access to the result
  let result_ptr = unsafe { CString::from_raw(result) };
  let result_str = result_ptr.to_str().unwrap();
  let output = env
    .new_string(result_str)
    .expect("Couldn't create a Java string!");
  output.into_inner()
}
Wait, what’s going on here? ![]()
We’d better stop for a moment and explain a little bit the previous code.
First of all, on the top of the file we can see two different directives:
#![cfg(target_os = "android")]
#![allow(non_snake_case)]
The first one will enable this code only when we’re compiling for Android and the second one will allow us to name our functions however we want. Rust enforces snake_case but we need to opt out of this in order to comply with the JNI naming conventions.
Ok, but then, why have you created two different functions (helloDirect and hello) and not just one? ![]()
Well, the answer is that I wanted to show you two ways of handling the Android part and let you decide which one is more convenient for your kind of project.
The first function uses the jni crate without interacting with the lib.rs code (a.k.a. iOS code) and the second one uses the same code we have in the lib.rs file.
The difference is clear. The first function is way clearer and more succint than the second one. Plus, in the second one, we have to deal with the hello_release function and unsafe while in the first one we don’t.
So, what we should do? In my opinion, I would use the first one. This is a super simple example where we’re just building a string and returning it. Ideally, this logic should be also encapsulated in a pure Rust library that would be consumed by both the iOS and the Android code. These pieces of code should be only concerned about providing the glue to the iOS and Android land via C headers and JNI and that’s it. So, ideally, in our example, instead of duplicating the logic in the Java_com_robertohuertas_rusty_1android_1lib_RustyKt_helloDirect function we would call another library.
Anyway, for the sake of knowing that you have several options, I think it’s good to explore all the approaches. ![]()
One more important thing. Note that we’re exporting our functions with system instead of C. This is just to stop cbindgen from generating signatures for these Android functions.
But wait, this won’t work! We haven’t exposed our android module.
Add this to the lib.rs file:
// add it below the use declarations.
#[cfg(target_os = "android")]
mod android;
The cfg attribute will prevent the android module we just created to be compiled in case we’re not targeting Android.
Compiling for Android
Let’s get ready to compile our code for Android.
Create a scripts folder inside the rust folder and add a file called android_build.sh with the following content:
#!/usr/bin/env bash
# set the version to use the library
min_ver=22
# verify before executing this that you have the proper targets installed
cargo ndk --target aarch64-linux-android --android-platform ${min_ver} -- build --release
cargo ndk --target armv7-linux-androideabi --android-platform ${min_ver} -- build --release
cargo ndk --target i686-linux-android --android-platform ${min_ver} -- build --release
cargo ndk --target x86_64-linux-android --android-platform ${min_ver} -- build --release

# moving libraries to the android project
jniLibs=../android/rusty-android/rusty-android-lib/src/main/jniLibs
libName=libdevicers.so

rm -rf ${jniLibs}

mkdir ${jniLibs}
mkdir ${jniLibs}/arm64-v8a
mkdir ${jniLibs}/armeabi-v7a
mkdir ${jniLibs}/x86
mkdir ${jniLibs}/x86_64

cp target/aarch64-linux-android/release/${libName} ${jniLibs}/arm64-v8a/${libName}
cp target/armv7-linux-androideabi/release/${libName} ${jniLibs}/armeabi-v7a/${libName}
cp target/i686-linux-android/release/${libName} ${jniLibs}/x86/${libName}
cp target/x86_64-linux-android/release/${libName} ${jniLibs}/x86_64/${libName}
Similarly to the previously suggested build script for iOS, this script will help us to compile and move the needed files to our previously created Android Library.
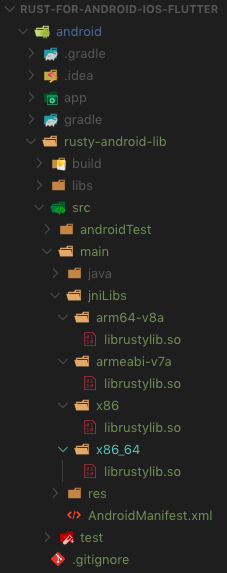
If you execute this bash script, once the compilation process ends you should be able to find a treeview similar to this one, with a newly created folder called jniLibs with several subfolders in it referencing several architectures:
Writing the Android Library
Finally, we’re going to write our Android Library code and consume it from our Android application.
Let’s create a new file under android/rusty-android-lib/src/main/java/com/robertohuertas/rusty_android_lib called rusty.kt. Note that the name must be the same that we used when defining our JNI functions in our Rust library.
Copy the following code in it:
package com.robertohuertas.rusty_android_lib

external fun hello(to: String): String
external fun helloDirect(to: String): String

fun loadRustyLib() {
    System.loadLibrary("rustylib")
}
Here, we just declared two signatures mirroring our two Rust functions (remember the name we gave them in our Rust code) and a function that will be called in order to dynamically load the library. Note that we’re not using the name of the library (librustylib.so) but the name we gave to the crate.
Compiling the Android Library
If you want to generate an .aar file ready to be consumed by any Android app just use the Gradle tab of your Android Studio and look for a task called assemble. Right-click on it and select Run. This will compile your library and you’ll be able to find it at android/rusty-android-lib/build/outputs/aar/rusty-android-lib-release.aar.

Consuming the Android Library
In this case, we don’t need to consume the library as an .aar file because we have it in the same project. In case you want to know how to consume it like that just take a look at the Android Documentation.
In our example, we just need to add the library as a dependency in our android/app/build.gradle:
dependencies {
    implementation project(':rusty-android-lib')
}
And then, in our Android Studio, choose File > Sync project with Gradle files.
Now, open the file content_main.xml located at android/app/src/main/res/layout and add an id to the TextView, so we can reference it later and programmatically change its value:
android:id="@+id/txt"
After this, we’re going to use our Android Library from our MainActivity.kt file located at android/app/src/main/java/com/robertohuertas/rust_android. Open it and write this:
package com.robertohuertas.rusty_android

import android.os.Bundle
import com.google.android.material.snackbar.Snackbar
import androidx.appcompat.app.AppCompatActivity
import android.view.Menu
import android.view.MenuItem
import android.widget.TextView

import kotlinx.android.synthetic.main.activity_main.*
import com.robertohuertas.rusty_android_lib.*

class MainActivity : AppCompatActivity() {

    override fun onCreate(savedInstanceState: Bundle?) {
        super.onCreate(savedInstanceState)
        setContentView(R.layout.activity_main)
        setSupportActionBar(toolbar)

        loadRustyLib()

        findViewById<TextView>(R.id.txt).let {
            it?.text =  hello("Rob")
        }

        var greeting2 = helloDirect("Rob Direct")

        fab.setOnClickListener { view ->
            Snackbar.make(view, greeting2, Snackbar.LENGTH_LONG)
                .setAction("Action", null).show()
        }
    }

    override fun onCreateOptionsMenu(menu: Menu): Boolean {
        // Inflate the menu; this adds items to the action bar if it is present.
        menuInflater.inflate(R.menu.menu_main, menu)
        return true
    }

    override fun onOptionsItemSelected(item: MenuItem): Boolean {
        // Handle action bar item clicks here. The action bar will
        // automatically handle clicks on the Home/Up button, so long
        // as you specify a parent activity in AndroidManifest.xml.
        return when (item.itemId) {
            R.id.action_settings -> true
            else -> super.onOptionsItemSelected(item)
        }
    }
}
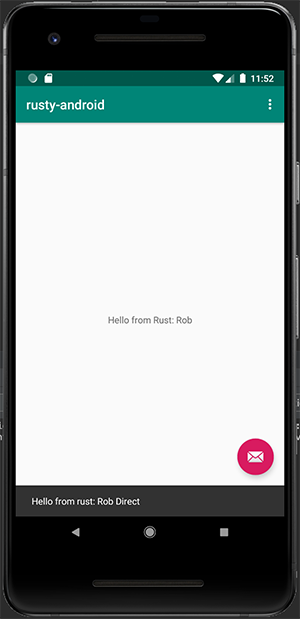
We’re done! Run it in your emulator and you should see a text in the app saying Hello from Rust: Rob. Furthermore, if you click the button below, a snackbar will show Hello from Rust: Rob direct. As you can see, we’re using both functions, the one calling the iOS function and the one using only the jni-rs crate.
Flutter Project
And now… let’s go for the bonus points!
As we already have an Android Library and a working iOS project, making this work in a Flutter project shouldn’t be very difficult.
The basic idea is to create a Flutter plugin package so we can share our code in several Flutter projects if needed.
So let’s start! ![]()
# let's use the flutter folder
cd flutter
# create a plugin project, set its namespace and its name
flutter create --template=plugin --org com.robertohuertas rusty_flutter_lib
# now you'll have a folder called rusty_flutter_lib inside the flutter folder
# for convenience, we'll move everything to the parent directory (flutter)
# this last step is completely optional.
mv rusty_flutter_lib/{.,}* .
rm -rf rusty_flutter_lib
One of the cool things of the Flutter plugin packages is that the template comes with an example project, so we can use it to test that our plugin works as expected. No need to create a new project to test our Flutter plugin.
We’re basically going to use our previous Android and iOS code and use it in our Flutter project. This should be very straightforward.
Importing the Android library
In order to use the Android Library that we built before we’re going to use Android Studio. Let’s open the flutter/android project.
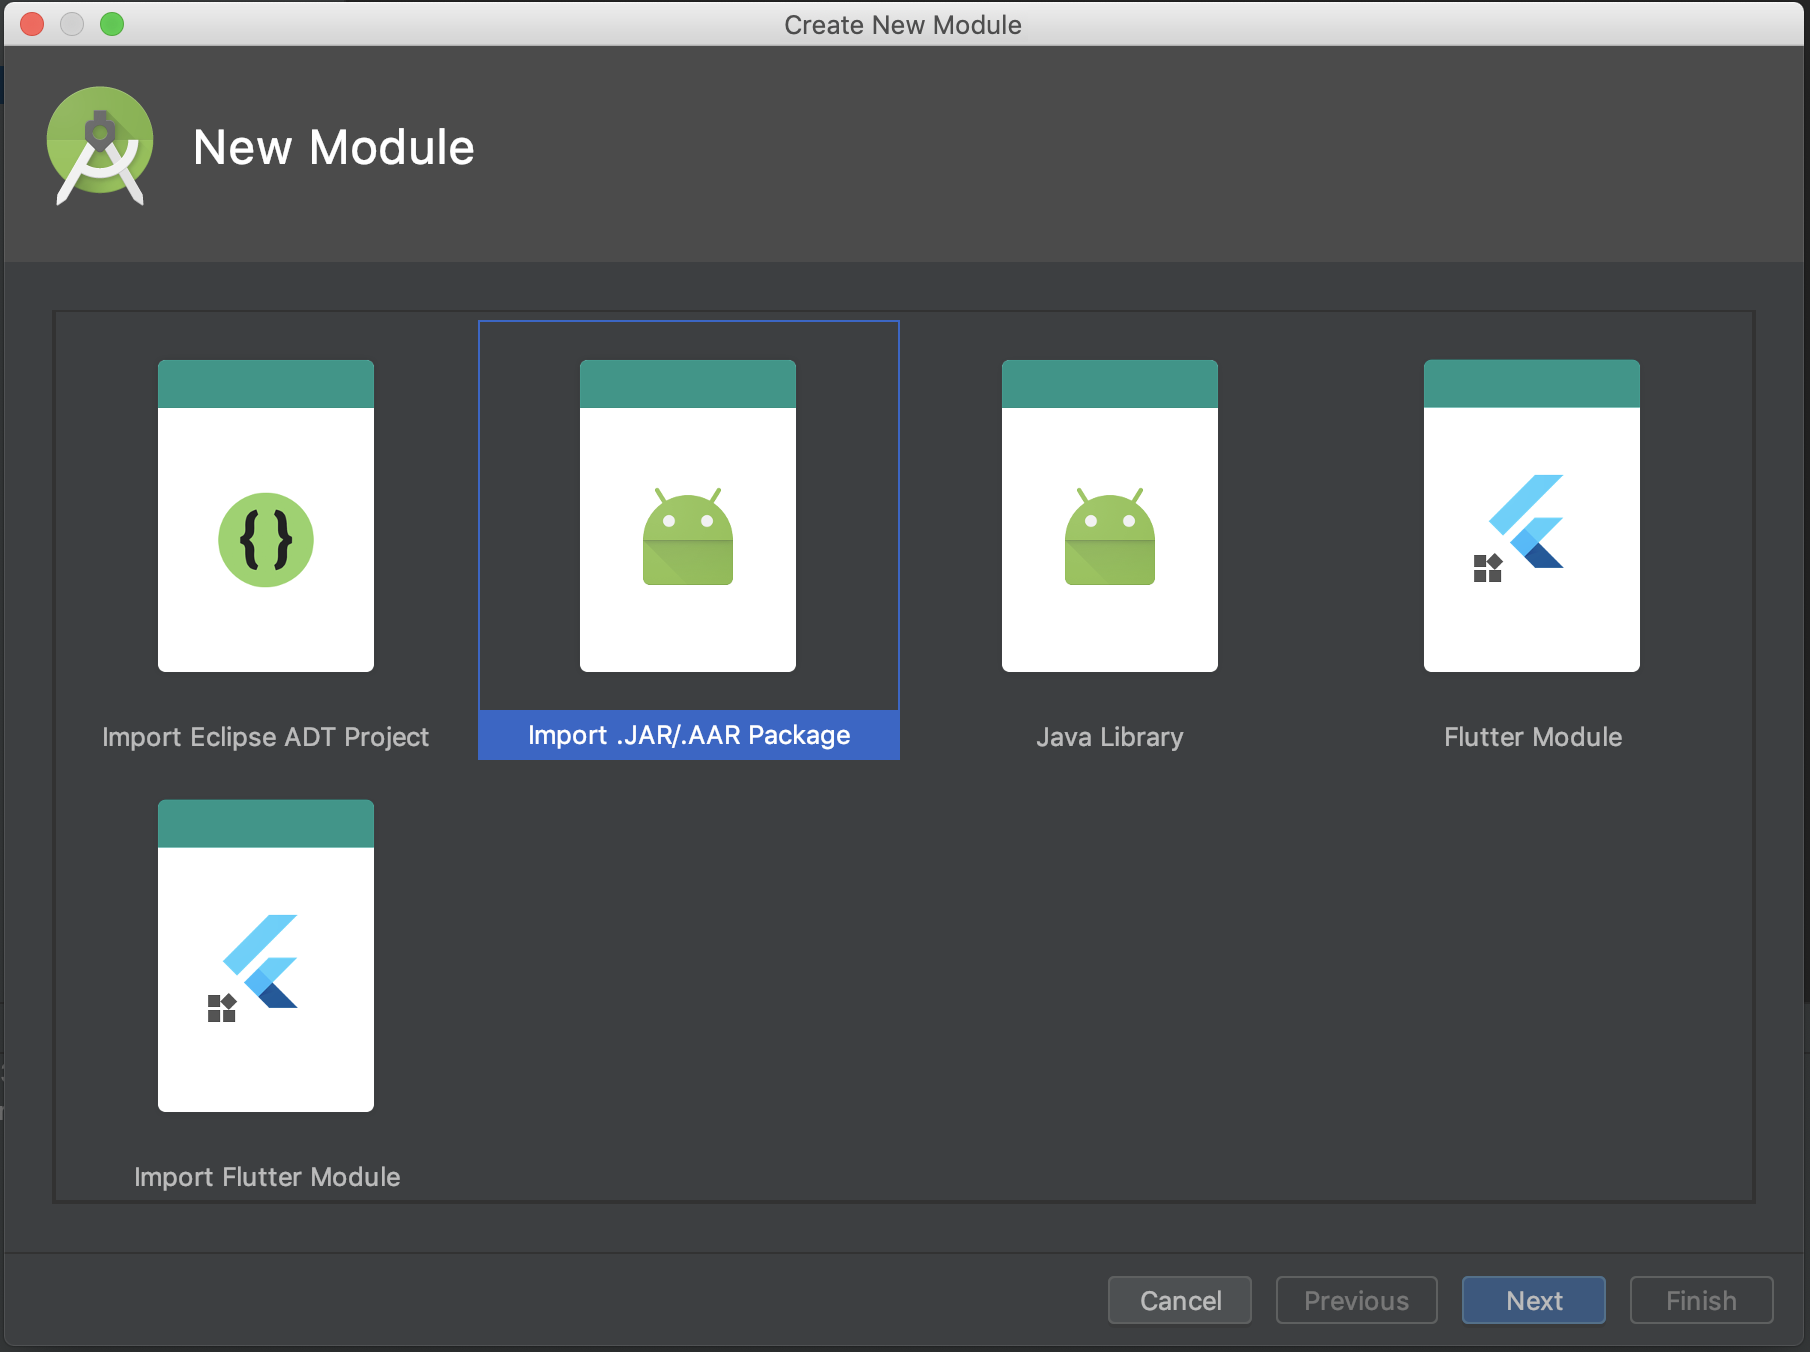
Then, in order to import the Android Library, select File > New... > New Module.

Select import .JAR/.AAR Package:
And use the previously generated .AAR Package path:
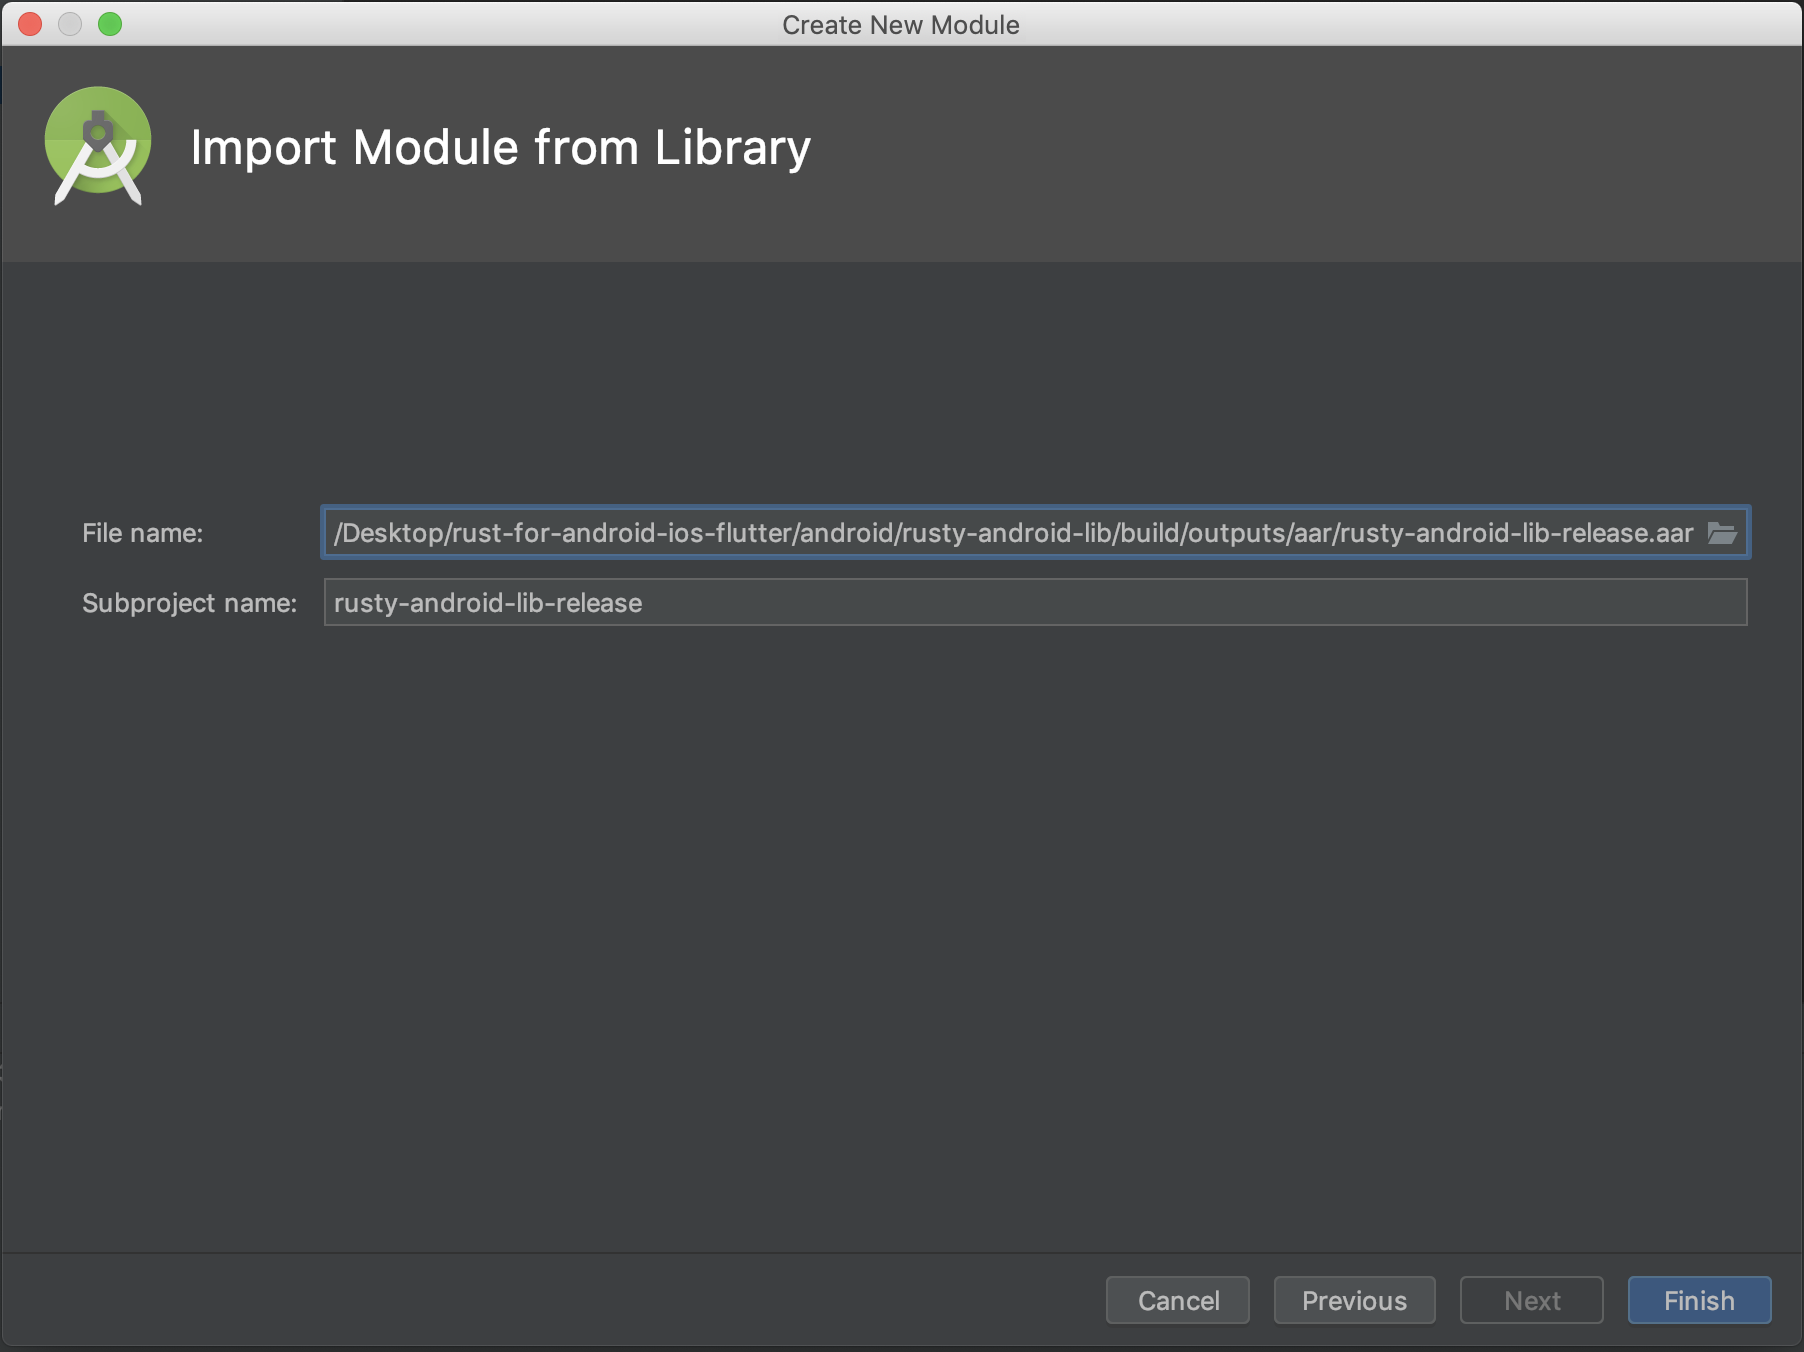
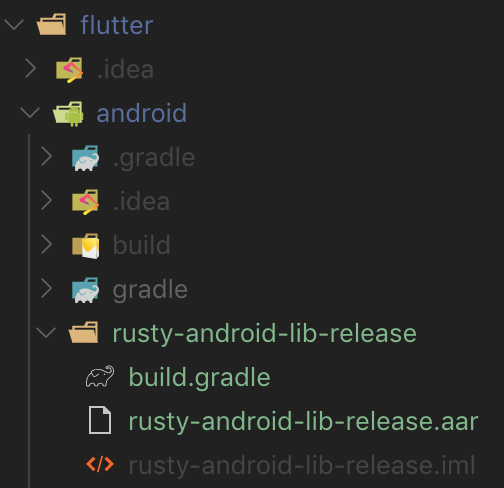
By doing this, we should see a new folder called rusty-android-lib-release folder with our .aar package inside along with some other files:
Finally, open the build.gradle file in the flutter/android folder and add a new dependency:
dependencies {
    implementation "org.jetbrains.kotlin:kotlin-stdlib-jdk7:$kotlin_version"
    // this is the line to add including the directory holding our .aar package:
    implementation fileTree(include: '*.aar', dir: 'rusty-android-lib-release')
}
Adding the Android platform code
Open flutter/android/src/main/kotlin/com/robertohuertas/rusty_flutter_lib/RustyFlutterLibPlugin.kt in your favorite IDE and replace the code in it with this one:
package com.robertohuertas.rusty_flutter_lib

// importing the Android library
import com.robertohuertas.rusty_android_lib.*

import io.flutter.plugin.common.MethodCall
import io.flutter.plugin.common.MethodChannel
import io.flutter.plugin.common.MethodChannel.MethodCallHandler
import io.flutter.plugin.common.MethodChannel.Result
import io.flutter.plugin.common.PluginRegistry.Registrar

class RustyFlutterLibPlugin: MethodCallHandler {
  companion object {
    @JvmStatic
    fun registerWith(registrar: Registrar) {
      val channel = MethodChannel(registrar.messenger(), "rusty_flutter_lib")
      channel.setMethodCallHandler(RustyFlutterLibPlugin())
      // dynamically loading the android library
      loadRustyLib()
    }
  }

  override fun onMethodCall(call: MethodCall, result: Result) {
    when {
      call.method == "getPlatformVersion" -> result.success("Android ${android.os.Build.VERSION.RELEASE}")
      call.method == "getHello" -> {
        val to = call.argument<String>("to")
          if (to == null) {
            result.success("No to parameter found")
          } else {
            // we're using the helloDirect function here
            // but you could also use the hello function, too.
            val res = helloDirect(to)
            result.success(res)
          }
      }
      else -> result.notImplemented()
    }
  }
}
Importing the iOS code
Importing the iOS code is fairly easy:
# copy the header to the Classes folder
cp ../rust/rustylib.h ios/Classes
# create a new libs folder
mkdir ios/libs
# copy the universal library into the libs folder
cp ../rust/target/universal/release/librustylib.a ios/libs/
Then open the rusty_flutter_lib.podspec file and add this line:
s.ios.vendored_library = 'libs/librustylib.a'
Adding the iOS plaform code
Open the flutter/ios/Classes/RustyFlutterLibPlugin.swift file and add the following code:
import Flutter
import UIKit

public class SwiftRustyFlutterLibPlugin: NSObject, FlutterPlugin {
  public static func register(with registrar: FlutterPluginRegistrar) {
    let channel = FlutterMethodChannel(name: "rusty_flutter_lib", binaryMessenger: registrar.messenger())
    let instance = SwiftRustyFlutterLibPlugin()
    registrar.addMethodCallDelegate(instance, channel: channel)
  }

  public func handle(_ call: FlutterMethodCall, result: @escaping FlutterResult) {
    if (call.method == "getPlatformVersion") {
      result("iOS " + UIDevice.current.systemVersion)
    } else if (call.method == "hello") {
      let res = hello("Rob")
      let sr = String(cString: res!)
      hello_release(UnsafeMutablePointer(mutating: res))
      result(sr)
    } else {
      result("No method found")
    }
  }
}
Connect the API and the platform code
Open the flutter/lib/rusty_flutter_lib.dart file and add a new static method in the RustyFlutterLib class:
static Future<String> hello({to: String}) async {
  final String greetings = await _channel.invokeMethod('hello', {'to': to});
  return greetings;
}
Testing the Flutter example app
Let’s open the flutter/example/lib/main.dart file with your IDE of choice and let’s consume our recently created Flutter package:
import 'package:flutter/material.dart';
import 'dart:async';

import 'package:flutter/services.dart';
import 'package:rusty_flutter_lib/rusty_flutter_lib.dart';

void main() => runApp(MyApp());

class MyApp extends StatefulWidget {
  @override
  _MyAppState createState() => _MyAppState();
}

class _MyAppState extends State<MyApp> {
  String _platformVersion = 'Unknown';
  String _greeting = '';

  @override
  void initState() {
    super.initState();
    initPlatformState();
  }

  // Platform messages are asynchronous, so we initialize in an async method.
  Future<void> initPlatformState() async {
    String platformVersion;
    String greeting;
    // Platform messages may fail, so we use a try/catch PlatformException.
    try {
      platformVersion = await RustyFlutterLib.platformVersion;
      greeting = await RustyFlutterLib.hello(to: 'Rob');
    } on PlatformException {
      platformVersion = 'Failed to get platform version.';
      greeting = 'Failed to get hello';
    }

    // If the widget was removed from the tree while the asynchronous platform
    // message was in flight, we want to discard the reply rather than calling
    // setState to update our non-existent appearance.
    if (!mounted) return;

    setState(() {
      _platformVersion = platformVersion;
      _greeting = greeting;
    });
  }

  @override
  Widget build(BuildContext context) {
    return MaterialApp(
      home: Scaffold(
        appBar: AppBar(
          title: const Text('Plugin example app'),
        ),
        body: Center(
          child: Column(
            mainAxisAlignment: MainAxisAlignment.center,
            children: <Widget>[
              Text(
                _greeting,
                style: TextStyle(fontSize: 20),
              ),
              Text('Running on: $_platformVersion\n'),
            ],
          ),
        ),
      ),
    );
  }
}
After that, go to the example/ios folder and execute this:
pod install
Then, open the example/android/app/build.gradle file and change the minSdkVersion from 16 to 22, as our library was built with this setting, too.
And finally, open the example/pubspec.yaml file and add the line below to avoid this issue when building the iOS version:
version: 1.0.0+1
Congratulations for arriving here! ![]()
Let’s run the example app and see if it’s working.
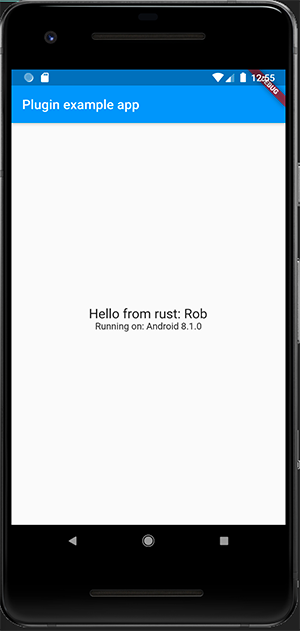
In Android you should see something similar to the screenshot below:
Similarly, in iOS:

Thanks for finishing this long reading! I hope you found it useful! ![]()
Bibliography